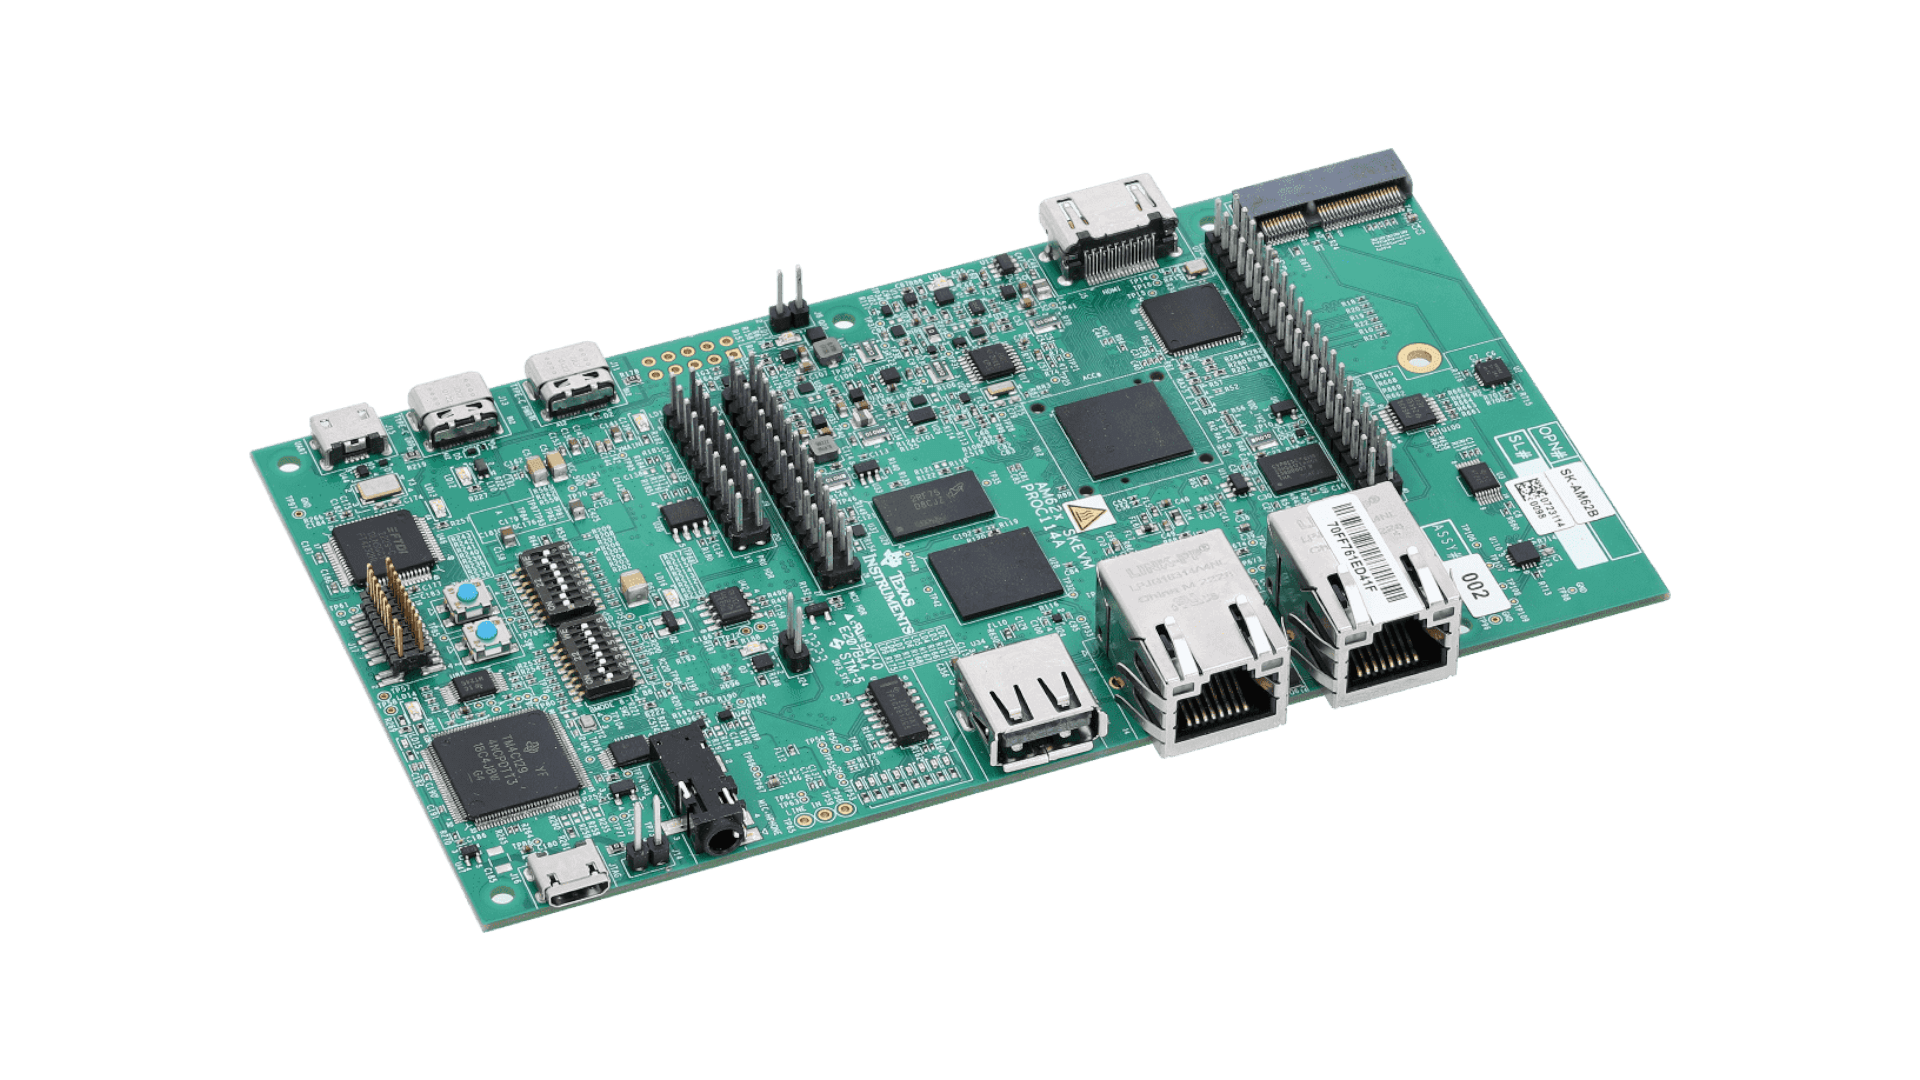
Flashing instructions:
- Force device in maskrom mode – erase bootloader from Linux:
dd if=/dev/zero of=/dev/mmcblkX bs=1M count=8 conv=fsync
- General instruction for flashing with RKdevtools: https://docs.armbian.com/User-Guide_Getting-Started/#rockchip
- USB connection for RKdevtools: use lower port, near to SD card reader.
- Bootloader binary: https://fi.mirror.armbian.de/dl/mekotronics-r58hd/u-boot/rk3588_spl_loader_v1.08.111.bin
UART:

In case you are unable to enter maskrom mode, use UART and execute following command at boot loader prompt:
=> mmc dev 0 => mmc erase 0x0 0x2000
Armbian requires the latest UEFI firmware for this board available here: https://forum.radxa.com/t/radxa-dragon-q6a-firmware-snapshot/
For flashing the (extracted) armbian image to UFS storage you can use the same edl-ng tool from flashing the firmware with this command:
./edl-ng --loader prog_firehose_ddr.elf --memory UFS write-sector 0 *.img
- Installation to NVME or USB is done via standard armbian install utility (
sudo armbian-install). Make sure to generate partitions and format them before start. - For UFS ready images use an image with the Extension UFS and flash it directly either via an USB-Adapter or via `rkdeveloptool`. See this Docs page for more information on how to flash Rockchip boards via Maskrom mode.
Flashing instructions:
- Force device in maskrom mode – erase bootloader from Linux:
dd if=/dev/zero of=/dev/mmcblkX bs=1M count=8 conv=fsync
- General instruction for flashing with RKdevtools: https://docs.armbian.com/User-Guide_Getting-Started/#rockchip
- USB connection for RKdevtools: use lower port, near to SD card reader.
- Bootloader binary: https://fi.mirror.armbian.de/dl/mekotronics-r58hd/u-boot/rk3588_spl_loader_v1.08.111.bin
UART:

In case you are unable to enter maskrom mode, use UART and execute following command at boot loader prompt:
=> mmc dev 0 => mmc erase 0x0 0x2000
Next-gen pocket-size single-board computer!
PocketBeagle 2 is an upgraded version of the popular PocketBeagle, designed as an ultra-compact, low-cost, and powerful single-board computer (SBC). Targeted at developers, students, and hobbyists, PocketBeagle 2 retains the simplicity and flexibility of its predecessor while delivering enhanced performance and expanded features to support modern development needs. PocketBeagle 2 is ideal for creating IoT devices, robotics projects, and educational applications. Its small form factor and low power consumption make it a versatile platform for embedded development, whether prototyping or deploying at scale.
PocketBeagle 2 is based on Texas Instruments AM6232 SoC. Its dual A53 cores can provide higher performance than classic PocketBeagle. The new design comes with pre-soldered headers, a 3-pin JST-SH 1.00mm UART debug port, a USB-C port, Texas Instruments MSPM0L1105 Cortex-M0+ MCU for ADC, 512MB RAM, and a LiPo Battery charger.
Easy. Affordable. Connected. Open.
BeaglePlay is Linux computing made simple and fun with 1,000s of available off-the-shelf sensors, actuators, indicators and connectivity options over mikroBUS, Grove, and QWIIC connections, a TI Sitara AM625 system-on-chip with 1.4GHz quad-core Arm Cortex-A53, PRU and M4 microcontrollers, Gigabit Ethernet, full-size HDMI, USB, 5GHz, 2.4GHz and sub-1GHz wireless, and single-pair Ethernet with power-over-data-line. Camera and touchscreen display ribbon-cable connectors also included.
No breadboarding expertise needed to expand this system, just connect, power, and leverage the massive ecosystem of Linux drivers. Want a remote sensor? Utilize BeagleConnect® technology over the sub-1GHz IEEE 802.15.4 wireless network to a BeagleConnect® Freedom up to 1km away.
Additional information
Details about the MKS Klipad50 board and Sovol’s KlipperScreen:
- Hardware details
- Implementation status in Armbian images
Github project with issue tracker, discussions and custom images:
Flashing instructions: